
How do you repair a damaged flexible printed circuit?
repair a damaged flexible printed circuit
Repairing a damaged flexible printed circuit (FPC) can be a challenging but necessary process, especially in applications where replacement might be costly or time-consuming. The ability to effectively repair an FPC hinges on understanding the nature of the damage, whether it’s due to mechanical stress, environmental exposure, or manufacturing defects. A systematic approach to repair can help restore functionality and extend the lifespan of the circuit.
The first step in repairing a damaged flexible printed circuit is to assess the extent and type of damage. This assessment often involves visual inspection under magnification to identify issues such as broken traces, delaminated layers, or cracks in the substrate. Depending on the damage, more advanced diagnostic tools like multimeters or oscilloscopes may be used to evaluate electrical continuity and functionality. This thorough evaluation is crucial, as it guides the repair process and helps prioritize the necessary steps.
Once the damage has been assessed, the next step is to prepare the area for repair. This preparation typically involves cleaning the damaged region of the FPC to remove any contaminants, such as dust, grease, or moisture, that could interfere with the repair process. Isopropyl alcohol is commonly used for cleaning purposes, as it evaporates quickly and does not leave residue. After cleaning, the area must be thoroughly dried to ensure that any repair materials adhere properly.
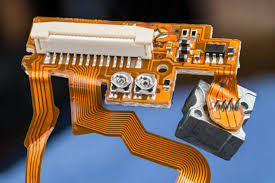
How do you repair a damaged flexible printed circuit?
One common type of damage that FPCs can suffer is a broken trace, which can disrupt electrical connectivity. To repair a broken trace, a process known as wire bonding may be used. This involves carefully applying a thin wire or jumper to bridge the gap where the trace has been broken. The wire is typically soldered to the existing conductive pathways on either side of the break, ensuring a secure electrical connection. It is important to use solder that is compatible with the materials of the FPC to prevent further damage during the repair process.
For more extensive damage, such as delaminated layers or large areas of missing conductive material, the use of conductive adhesives or specialized conductive paints may be necessary. These materials can effectively fill in gaps or reconnect separated layers. Conductive epoxy is a common choice for this type of repair, as it offers good adhesion and electrical conductivity. The adhesive must be applied carefully to avoid excess that could spread to unwanted areas, potentially causing short circuits.
In some cases, when the damage is severe or affects critical components, it may be more effective to use a patch. This involves cutting a piece of similar flexible printed circuit material and attaching it over the damaged area. The patch can be secured using conductive adhesive or solder, depending on the extent of the damage and the materials involved. This method can help restore functionality while minimizing the impact on the flexibility of the circuit.
After repairs are made, the final step involves testing the circuit to ensure that it operates correctly. This may involve checking for continuity, measuring resistance, or using functional tests to verify that all components are working as intended. If the repair is successful, the FPC should demonstrate the desired electrical performance, allowing it to be put back into service.
It’s important to note that while many FPC repairs can be performed effectively, some damage may render the circuit beyond repair. In such cases, replacement may be the only viable option. Therefore, having a backup plan and understanding the limitations of repair processes is crucial.